Accessing via USB
Do not use MTP while the device is busy
A lot of users have suffered from corrupted file systems after transferring data via MTP. Consequently, we have decided to remove MTP with the next KNULLI version. Until then, we strongly recommend that you do not use MTP unless you are absolutely sure what you are doing.
The corruption is caused by running more than one writing process in parallel. While you are transferring data via MTP, no other process is allowed to write anything to the SD card. You should never attempt to play a game, sync saves, edit configuration, use network transfer, install a theme or anything like that until after MTP transfer was finished and the USB connection was separated gracefully.
Writing any data via MTP while also writing any data through any other process will cause file system corruption.
If you encountered file system corruption, the best course of action would be to simply start over with a fresh installation.
KNULLI supports USB transfer via ADB. To change USB mode,
- press Start to bring up the main menu
- go to Device Settings
- find USB Mode
- set it to
- ADB for Android Debug Bridge
- MTP (not recommended)
- Off to disable USB access (default)
Don't forget to update your gamelists!
Once your data is completely transferred, make sure to update your gamelists to make the data available. You can do so by pressing Start to open the main menu, then open Game settings and select Update gamelists. KNULLI will rescan all game folders and identify all the games you added to make them available in EmulationStation.
ADB (Android Debug Bridge)
If network transfer is not an option for you, but you still want to rely on the ext4 file system, you can set up Android Debug Bridge (ADB) to access your KNULLI device via USB connection. However, this is a bit more challenging than going through MTP as you need third-party software to establish the ADB connection.
Install ADB
To access your device via USB, you will need two download and install
- the ADB SDK Platform tools (Memorize the location where you installed it!)
- an ADB browser, e.g. ADB Explorer for Windows
Configure ADB Explorer
After installing ADB SDK Platform tools and ADB Explorer, you need to point ADB Explorer to the adb.exe file inside the folder where you installed the ADB SDK Platform tools. Next, make sure to select Disk Usage Only as your Progress Method.

Step 1: Open ADB Explorer and click the Change button to select the path to your ADB installation. Point to the
|
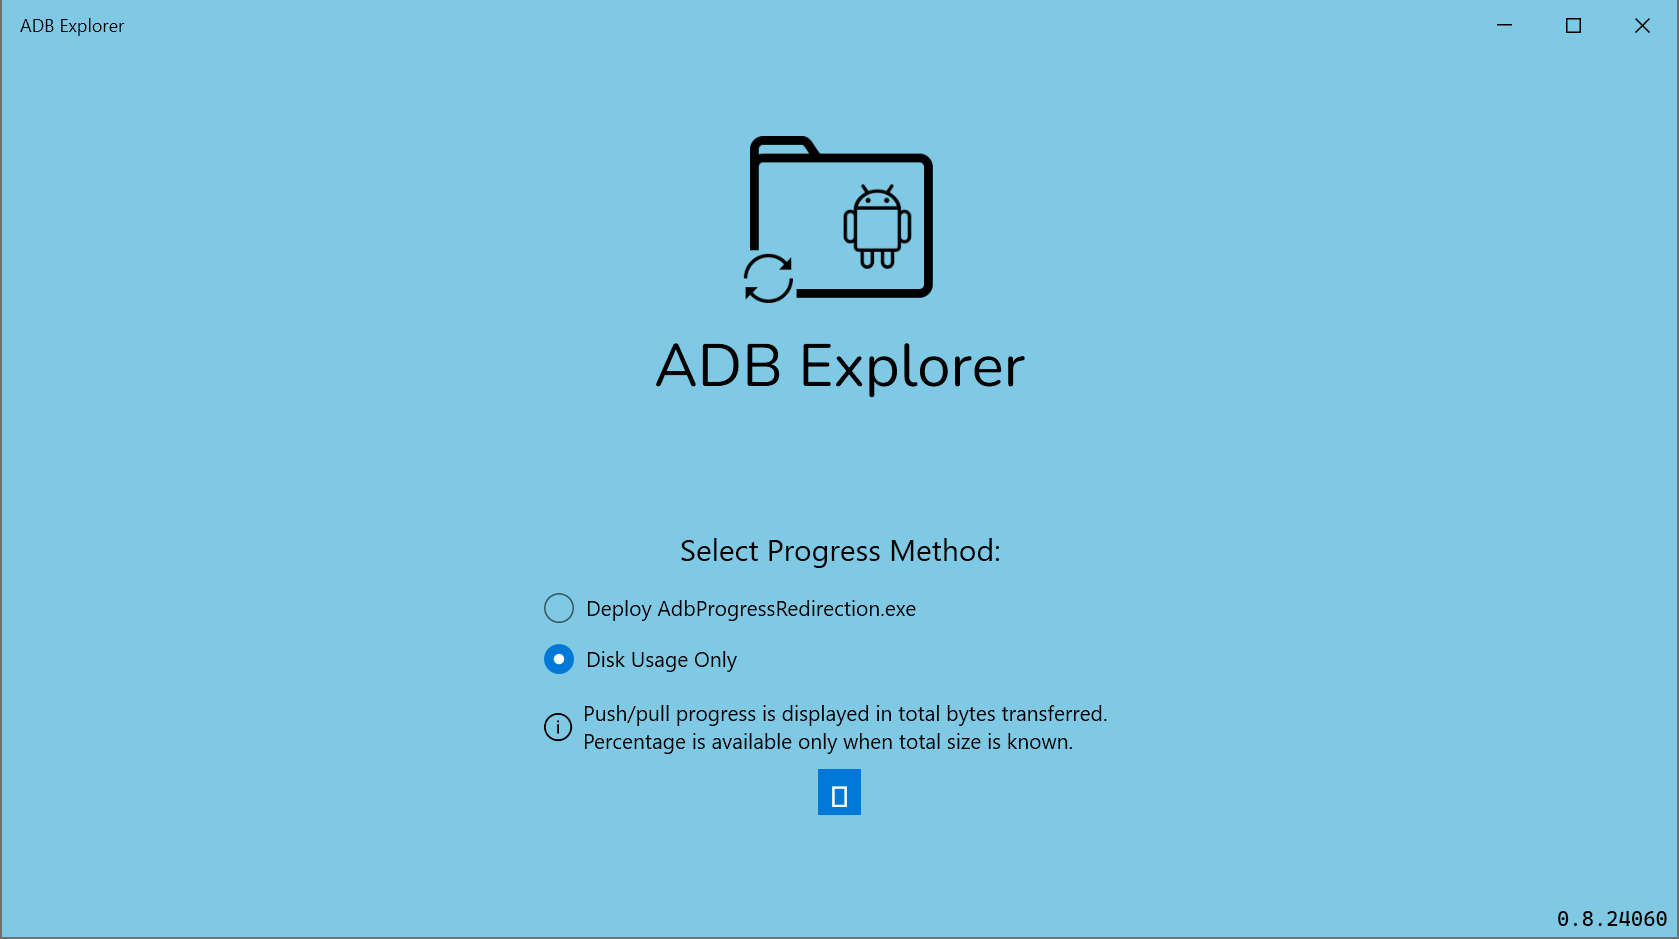
Step 2: Select Disk Usage Only as your Progress Method. |
Transfer your data
Now that you have set up your ADB Explorer, you may use it to
- add files to your device (push).
- get files from your device (pull).
- delete files from your device.
Browsing your device with ADB Explorer
Before you start adding or removing files, take a moment to understand how to navigate. In your ADB Explorer, your KNULLI device will present itself as Nexus 4 at the top-left of the ADB Explorer window.
- Click Nexus 4 to expand and then Browse.
- In the next menu, make sure to double-click Root, which will take you to the root folder of your KNULLI device.
- From here, scroll down and double-click
userdatato enter your userdata folder. - You can use the Up symbol or the Back arrow in the address bar to return to the previous folder.
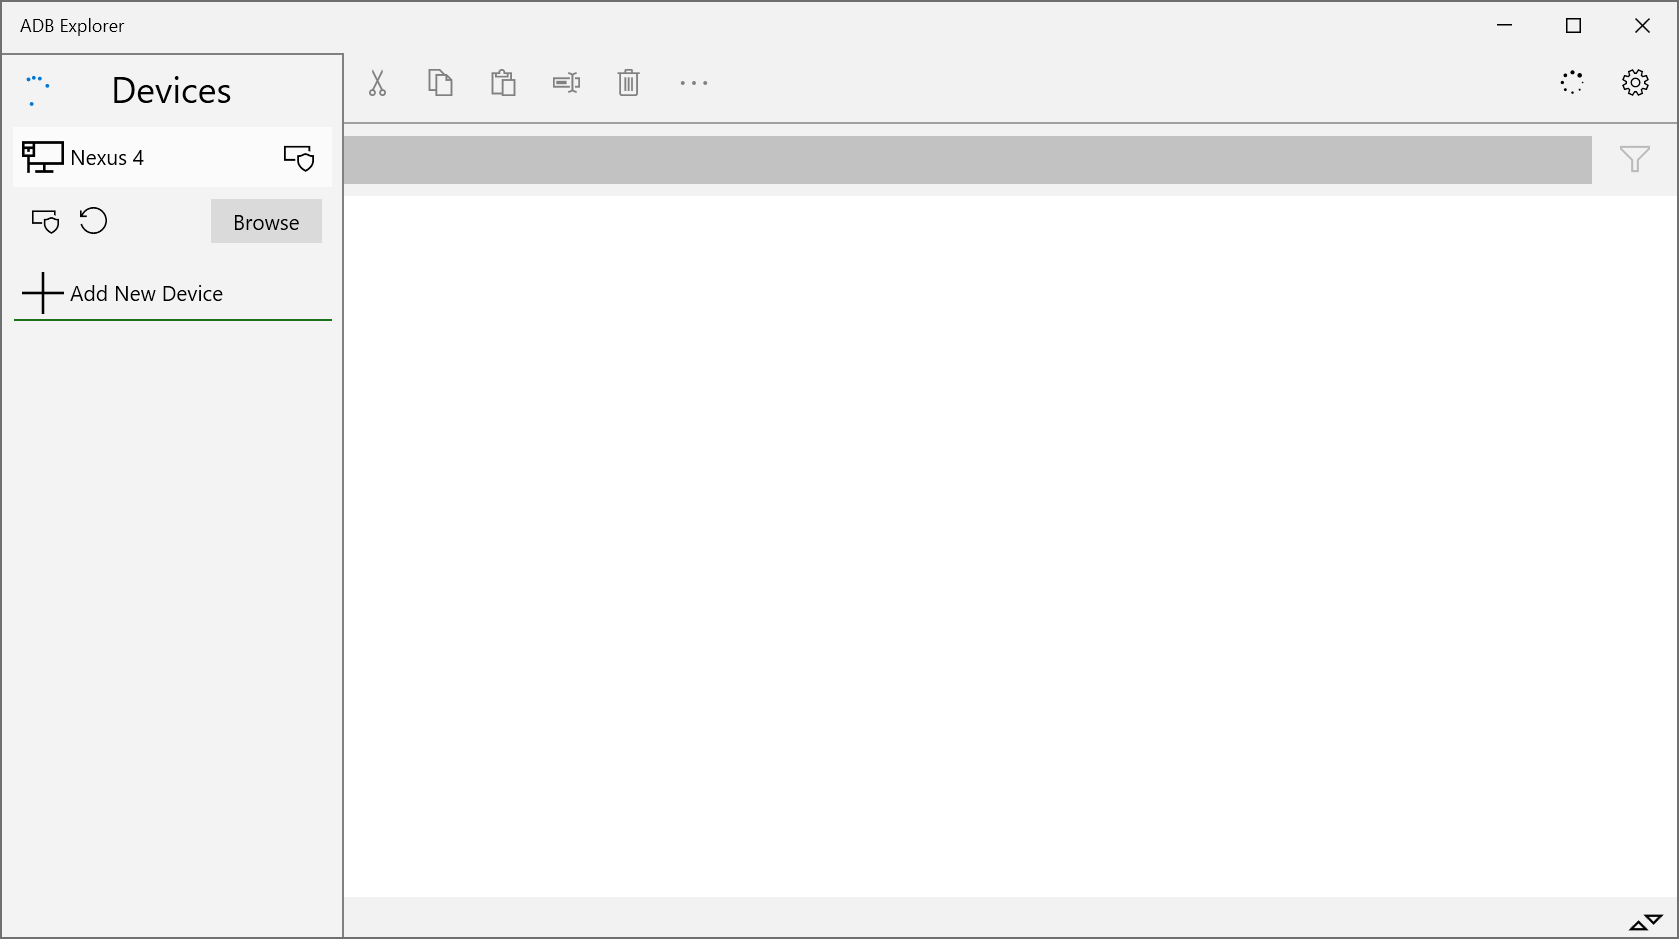
Step 1: Click Nexus 4 to expand the device and click Browse to start browsing.
|
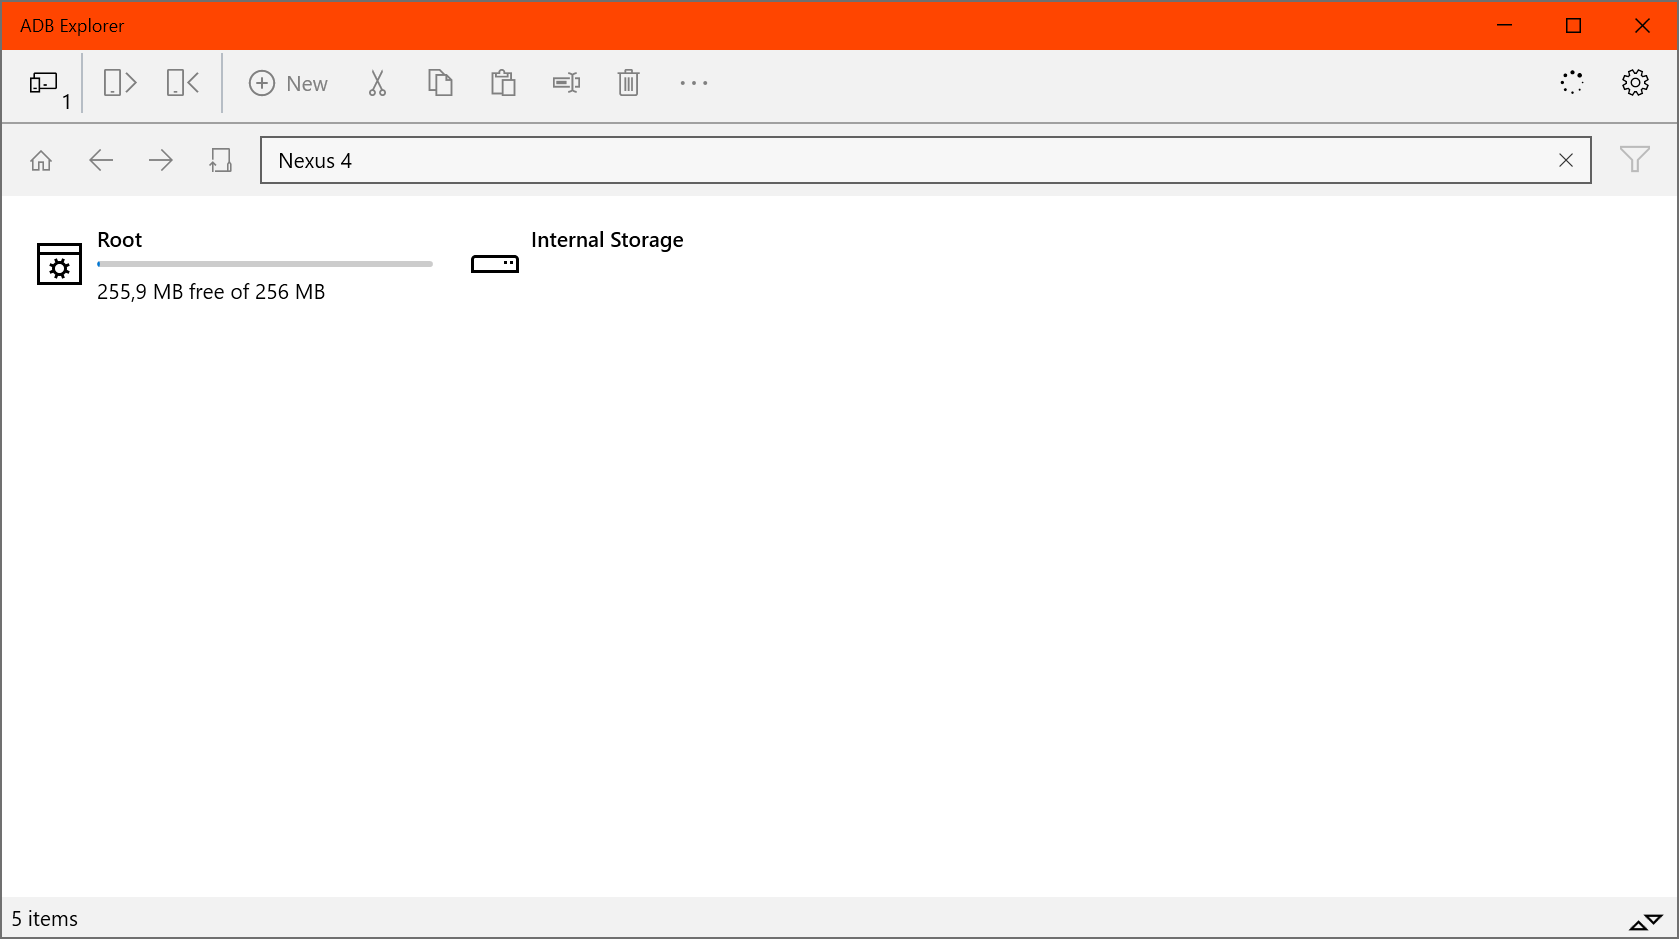
Step 2: Double-click Root to enter the root folder of your KNULLI device. |
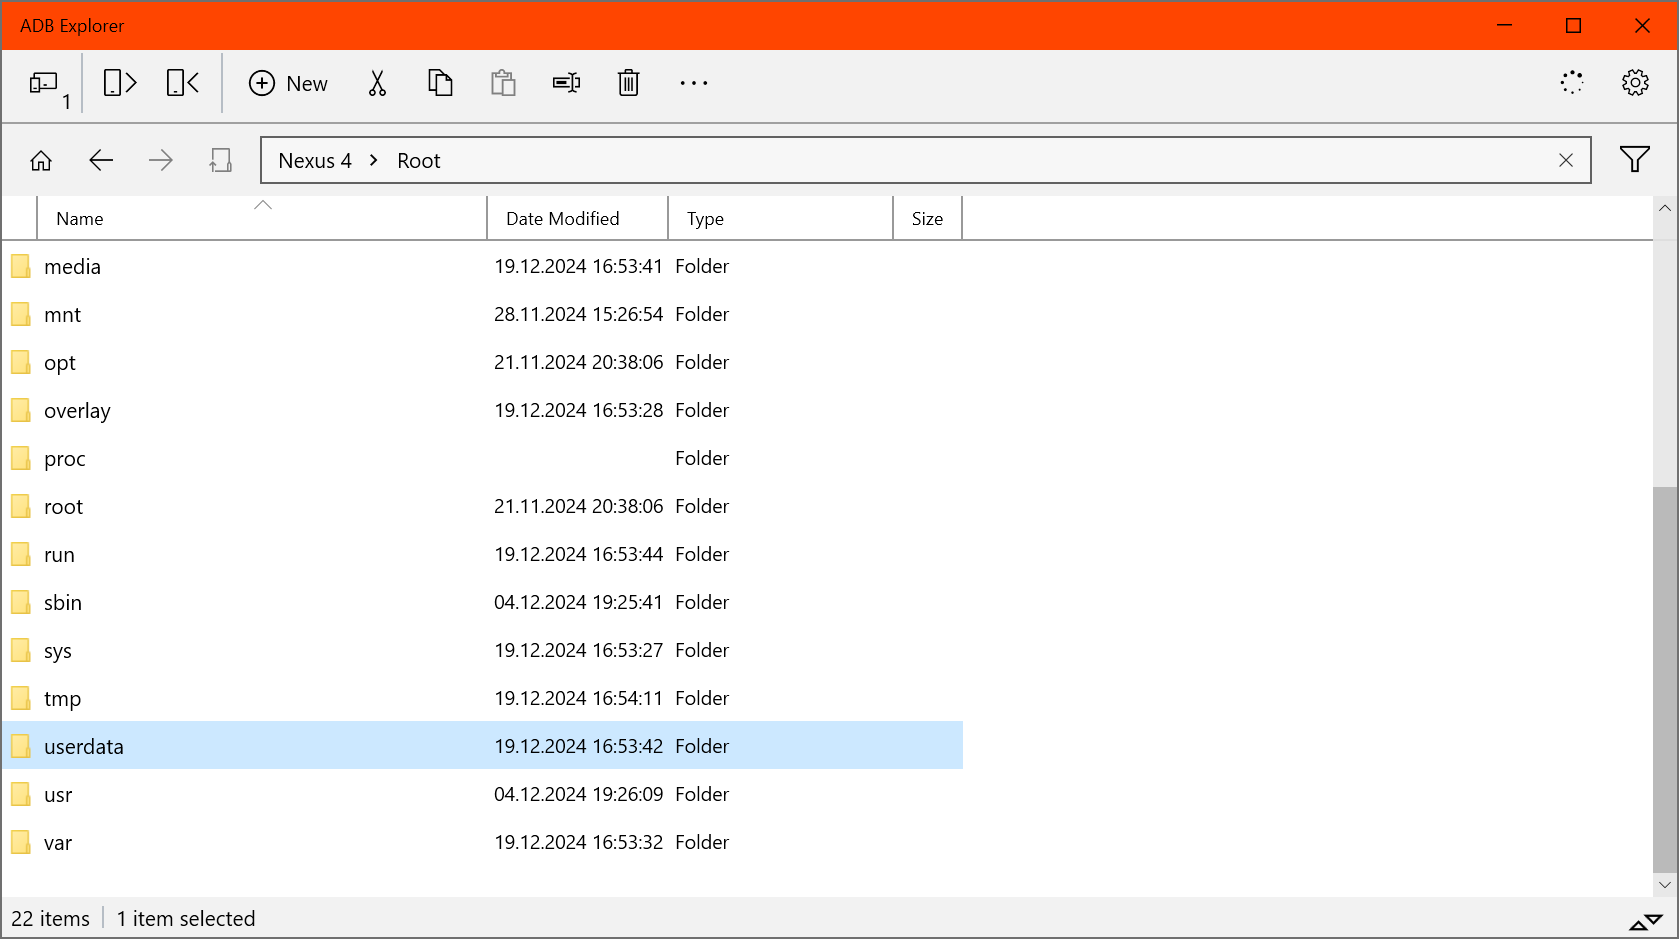
Step 3: Scroll down and double-click
|

Step 4: You have reached the |
Adding/retrieving/deleting files to/from your device
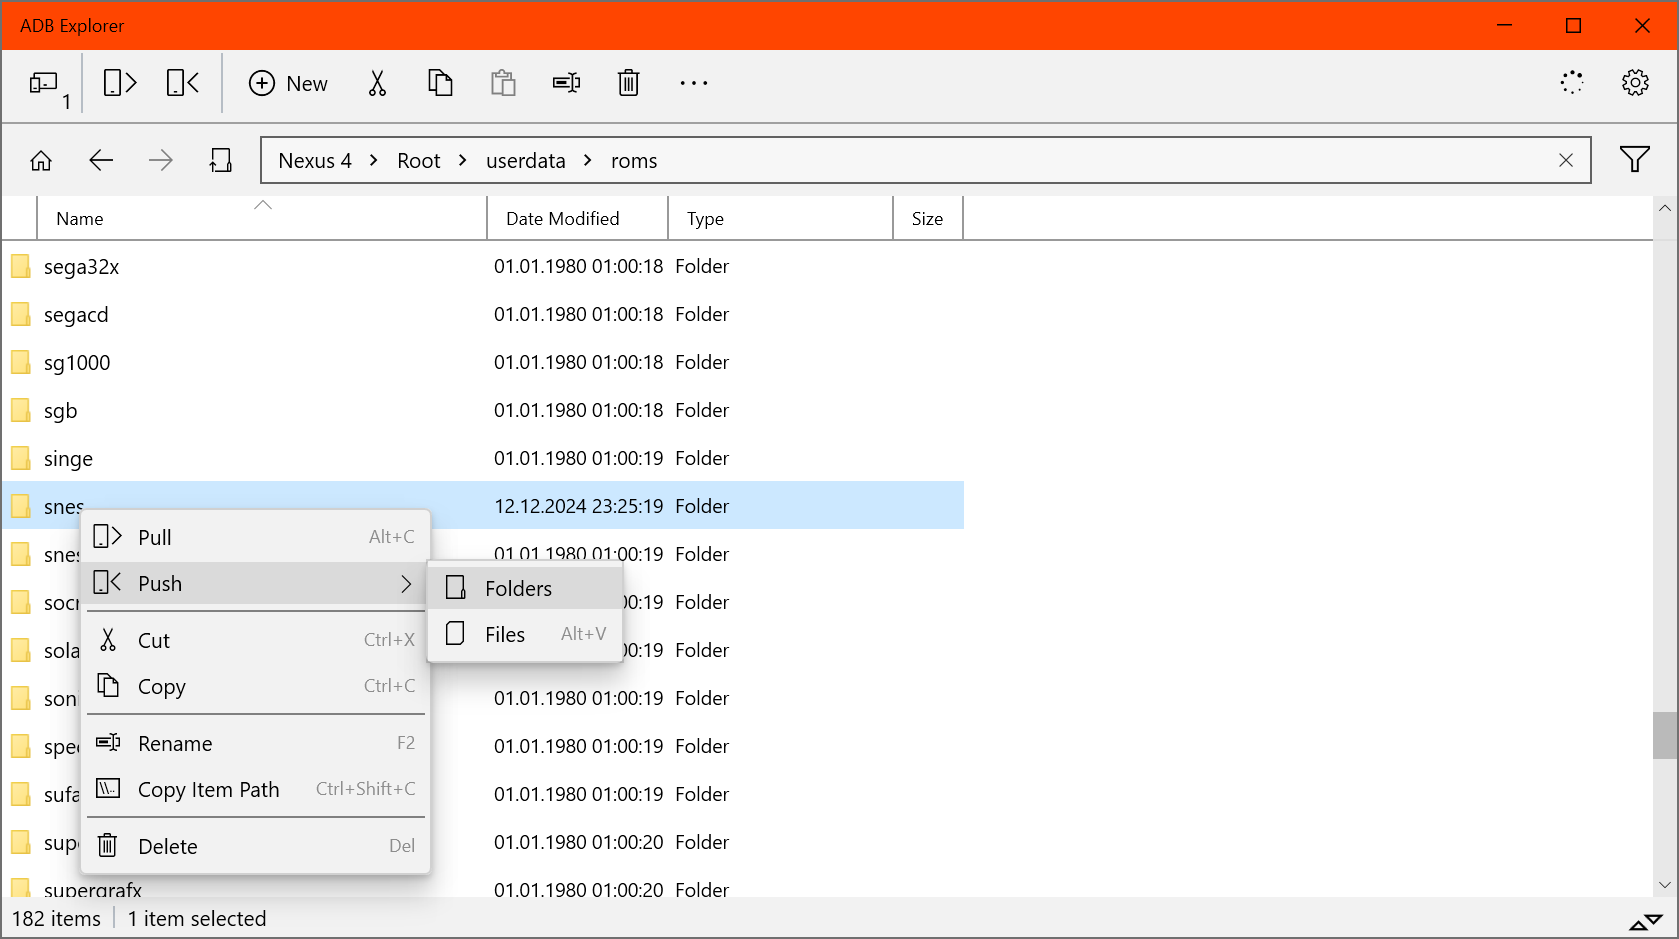
In ADB, adding something to a device is called push while retrieving something from a device is called pull.
If you want to push or pull a device to/from a folder, navigate to said folder and right-click it to bring up the context menu. Here, you will find options to push, pull, and even delete files.
Establish a command line connection
ADB doesn't only enable file transfers but also allows command line access to your KNULLI device. The ADB command line is very limited in comparison to an SSH shell, however, when SSH is not an option, ADB can still be a handy tool to access your device.
To establish an ADB shell connection from a Windows computer, simply locate the folder of your ADB SDK Platform tools installation and run
from a Windows Terminal (PowerShell or CMD) to get command line access to your KNULLI device.