Acceso por USB
No uses MTP mientras el dispositivo esté ocupado.
Muchos usuarios han experimentado daños en el sistema de archivos después de transferir datos mediante MTP. Por ello, hemos decidido eliminar MTP en la próxima versión de KNULLI. Hasta entonces, te recomendamos fuertemente que no uses MTP a menos que estés completamente seguro de lo que estás haciendo.
El daño se produce al ejecutar más de un proceso de escritura en paralelo. Mientras transfieres datos mediante MTP, ningún otro proceso puede escribir nada en la tarjeta SD. Nunca intentes jugar, sincronizar partidas guardadas, editar la configuración, usar la transferencia de red, instalar un tema ni nada similar hasta que la transferencia MTP haya finalizado y la conexión USB se haya desconectado correctamente.
Escribir datos mediante MTP mientras también se escriben mediante cualquier otro proceso provocará daños en el sistema de archivos.
Si detectas daños en el sistema de archivos, lo mejor es empezar de cero con una nueva instalación.
KNULLI admite la transferencia USB mediante ADB. Para cambiar el modo USB:
- Presiona Start para abrir el menú principal.
- Ve a Device Settings.
- Busca USB Mode.
- Configúralo en:
- ADB para Android Debug Bridge.
- MTP (no recomendado).
- OFF para deshabilitar el acceso USB (predeterminado).
¡No olvides actualizar tus listas de juegos!
Una vez que tus datos se hayan transferido por completo, asegúrate de actualizar tus listas de juegos para que estén disponibles. Puedes hacerlo presionando Start para abrir el menú principal, luego abre Ajustes de Juegos y selecciona Actualizar Listas de Juegos. KNULLI volverá a escanear todas las carpetas de juegos e identificará todos los juegos que añadiste para que estén disponibles en EmulationStation.
ADB (Android Debug Bridge)
Si la Transferencia de Red no es una opción para ti, pero aún así prefieres usar el sistema de archivos ext4, puedes configurar Android Debug Bridge (ADB) para acceder a tu dispositivo KNULLI mediante una conexión USB. Sin embargo, esto es un poco más complejo que usar MTP, ya que necesitas un software de terceros para establecer la conexión ADB.
Instalar ADB
Para acceder a tu dispositivo mediante USB, necesitarás descargar e instalar:
- ADB SDK Platform Tools (¡Recuerda la dirección donde las instales!).
- Un navegador ADB, por ejemplo, ADB Explorer for Windows.
Configurar ADB Explorer
Después de instalar ADB SDK Platform Tools y ADB Explorer, debes configurar ADB Explorer para que apunte al archivo adb.exe dentro de la carpeta donde instalaste ADB SDK Platform Tools. A continuación, asegúrate de seleccionar Disk Usage Only como tu Progress Method.

Paso 1: Abre ADB Explorer y haz clic en el botón Change para seleccionar la ruta de tu instalación de ADB. Selecciona el archivo
|
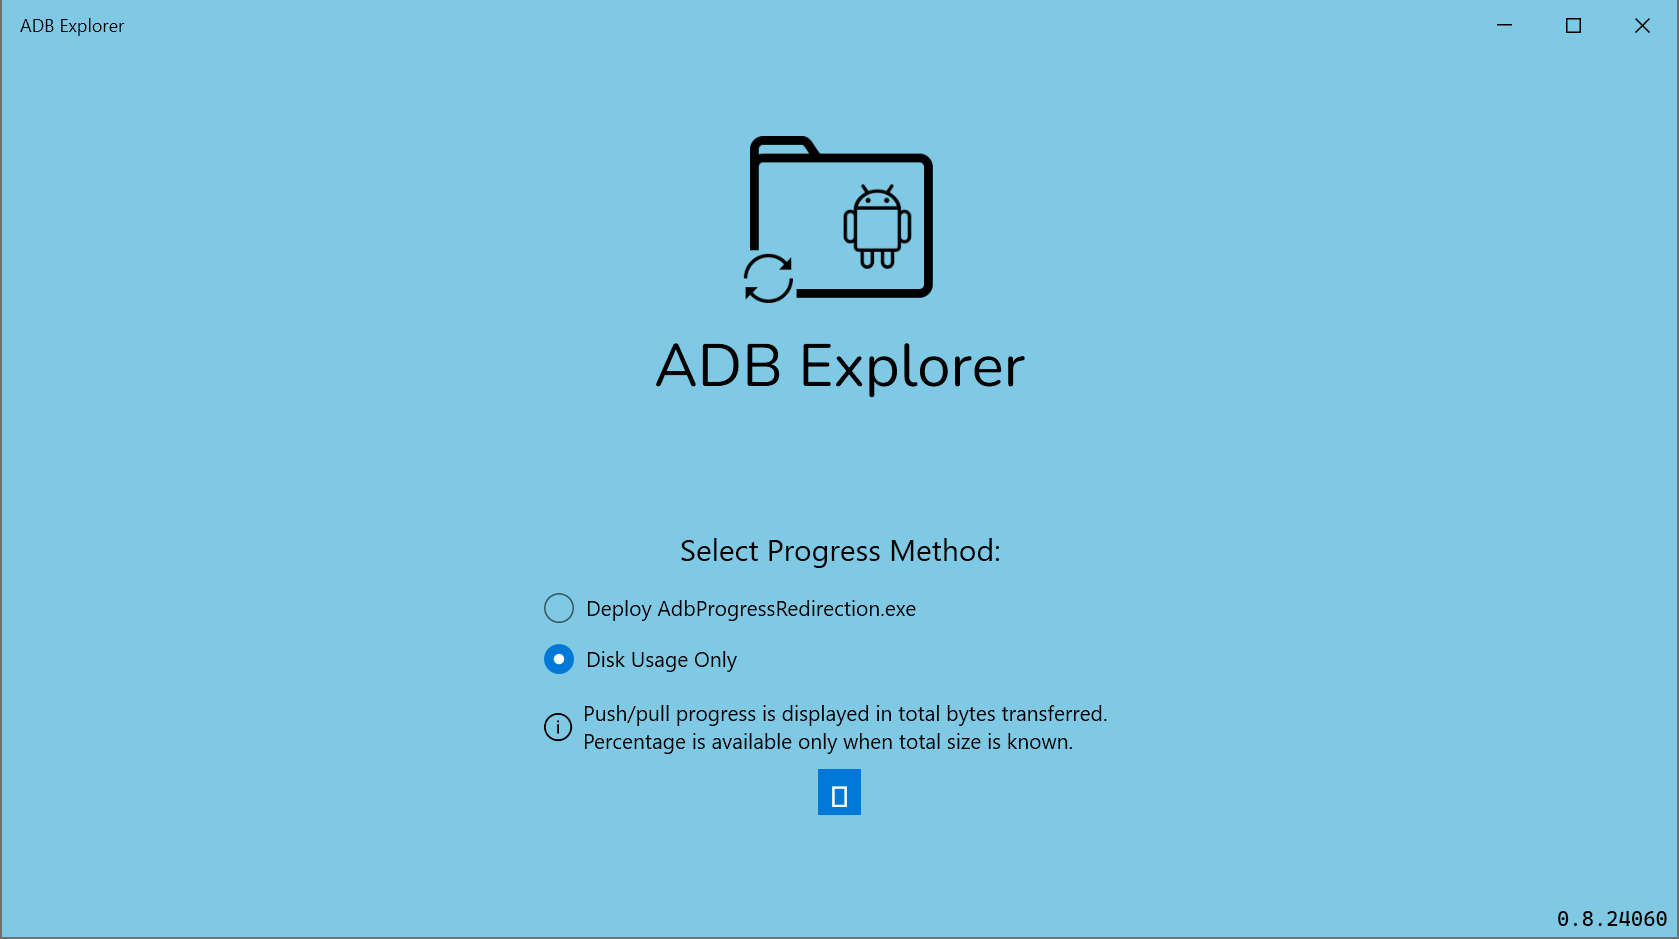
Paso 2: Selecciona Disk Usage Only como tu Progress Method. |
Transferir tus datos
Ahora que has configurado tu ADB Explorer, puedes usarlo para:
- Añadir archivos a tu dispositivo (push).
- Obtener archivos de tu dispositivo (pull).
- Eliminar archivos de tu dispositivo.
Navegar en tu dispositivo con ADB Explorer
Antes de empezar a agregar o eliminar archivos, dedica un momento a comprender cómo navegar. En tu ADB Explorer, tu dispositivo KNULLI se mostrará como Nexus 4 en la esquina superior izquierda de la ventana de ADB Explorer.
- Haz clic en Nexus 4 para expandirlo y luego en Browse.
- En el siguiente menú, asegúrate de hacer doble clic en Root, lo que te llevará a la carpeta raíz de tu dispositivo KNULLI.
- Desde aquí, desplázate hacia abajo y haz doble clic en
userdatapara acceder a tu carpeta userdata. - Puedes usar el símbolo hacia Arriba o la flecha hacia Atrás en la barra de direcciones para volver a la carpeta anterior.
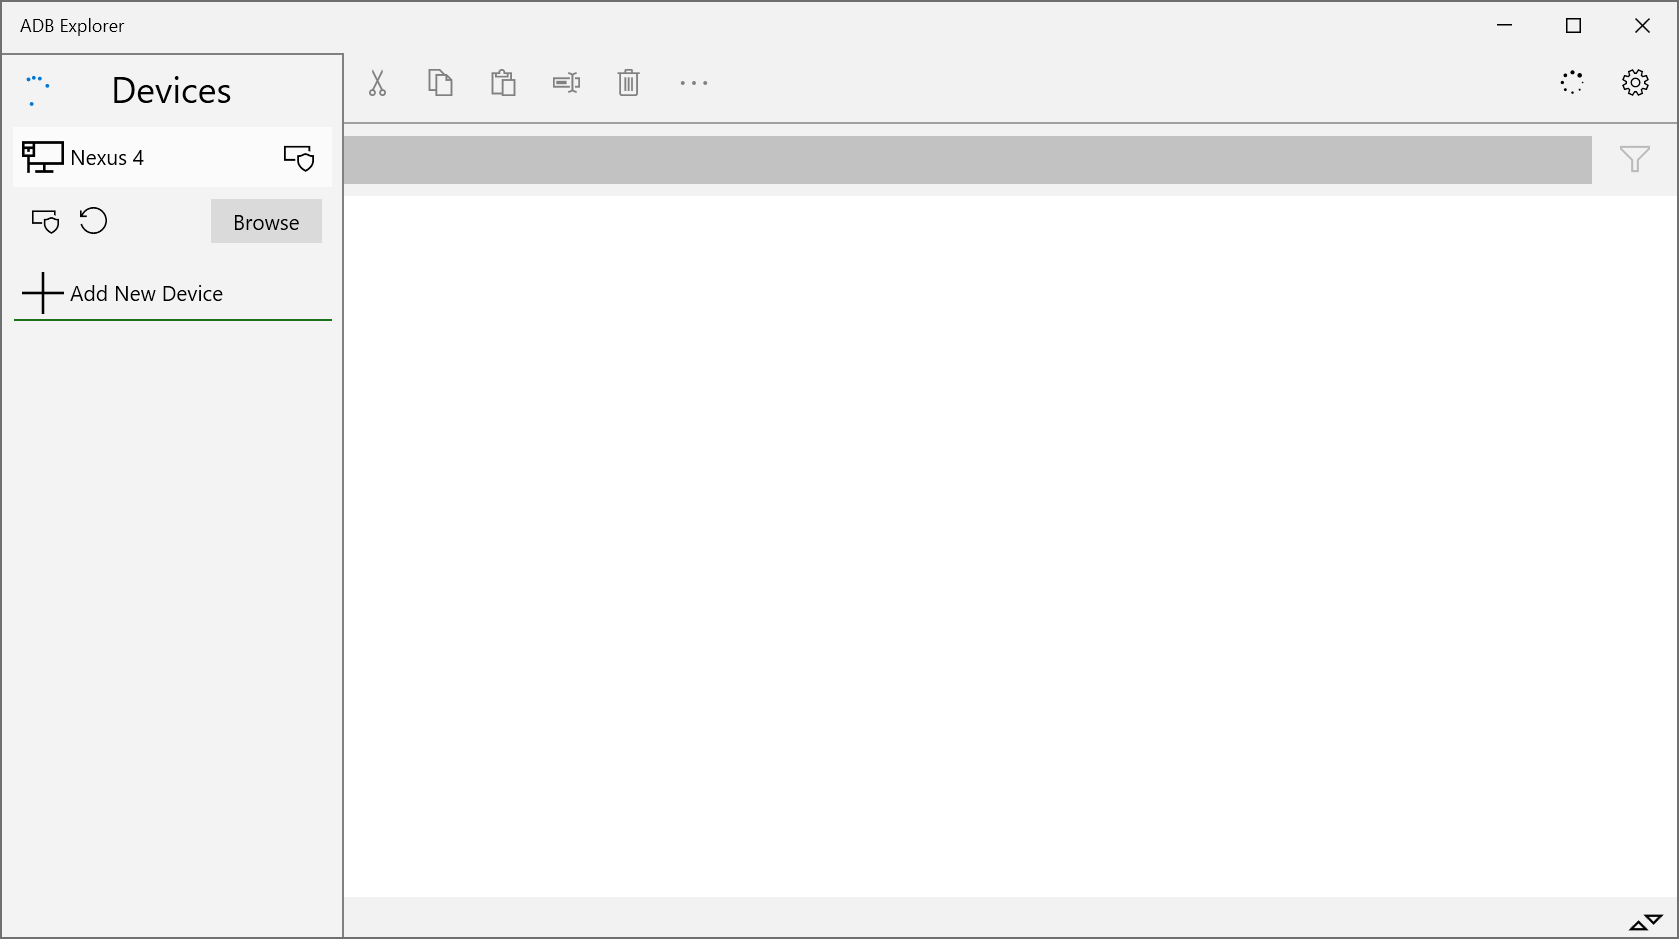
Paso 1: Haz clic en Nexus 4 para expandir el dispositivo y haz clic en Browse para comenzar a navegar.
|
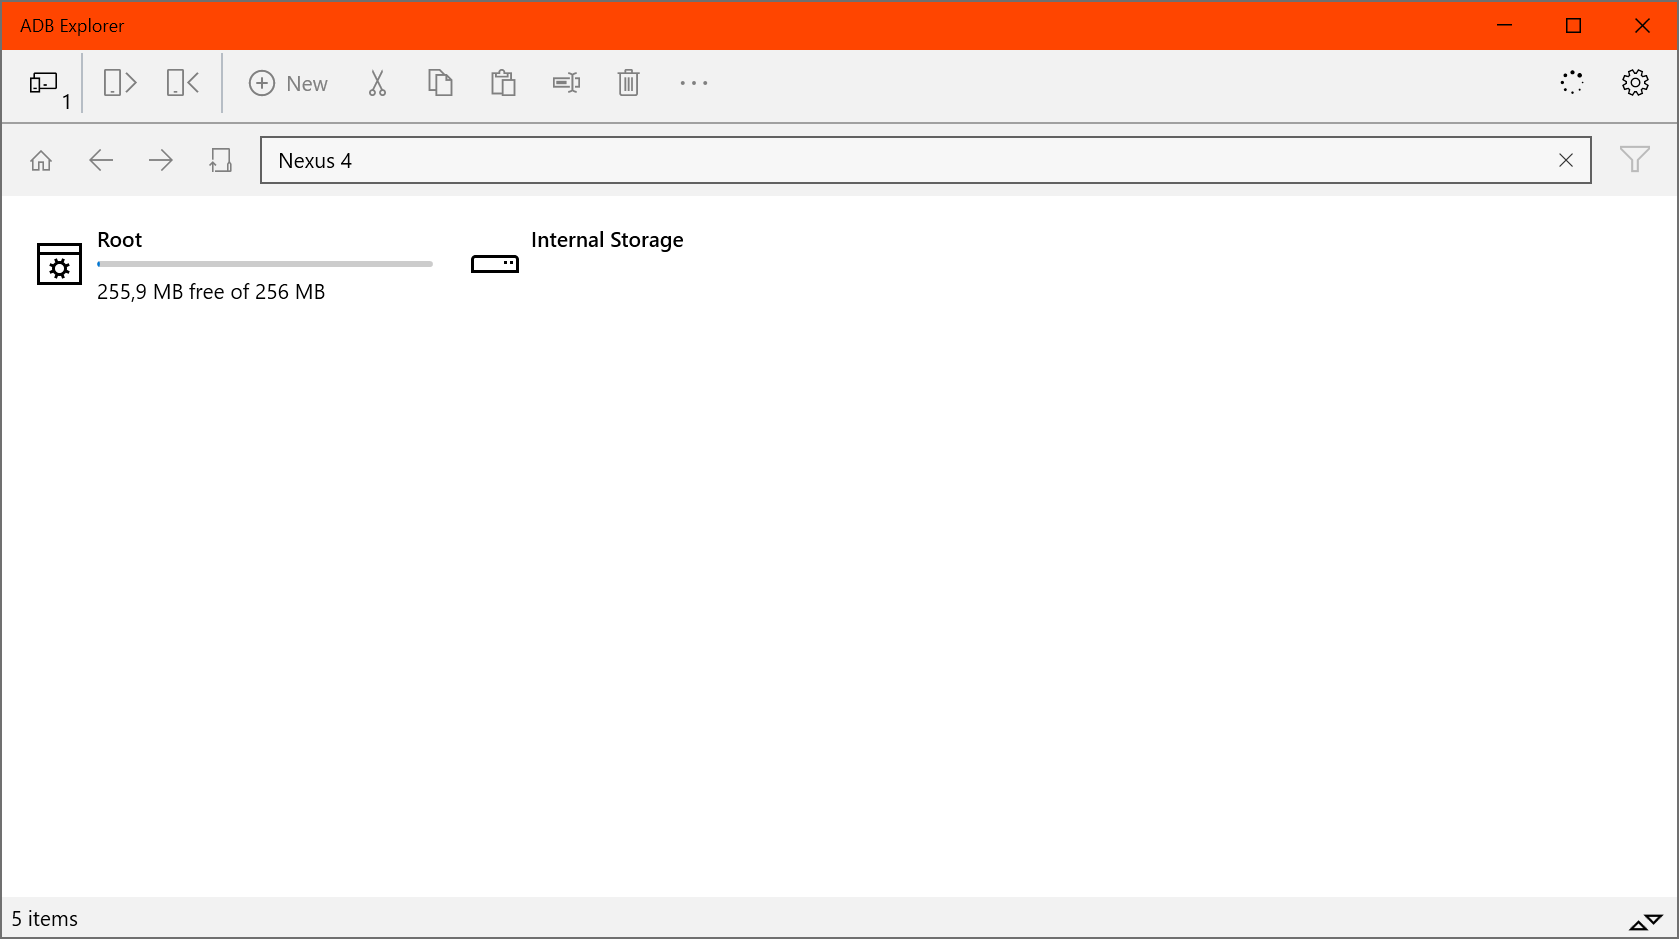
Paso 2: Haz doble clic en Root para ingresar a la carpeta raíz de tu dispositivo KNULLI. |
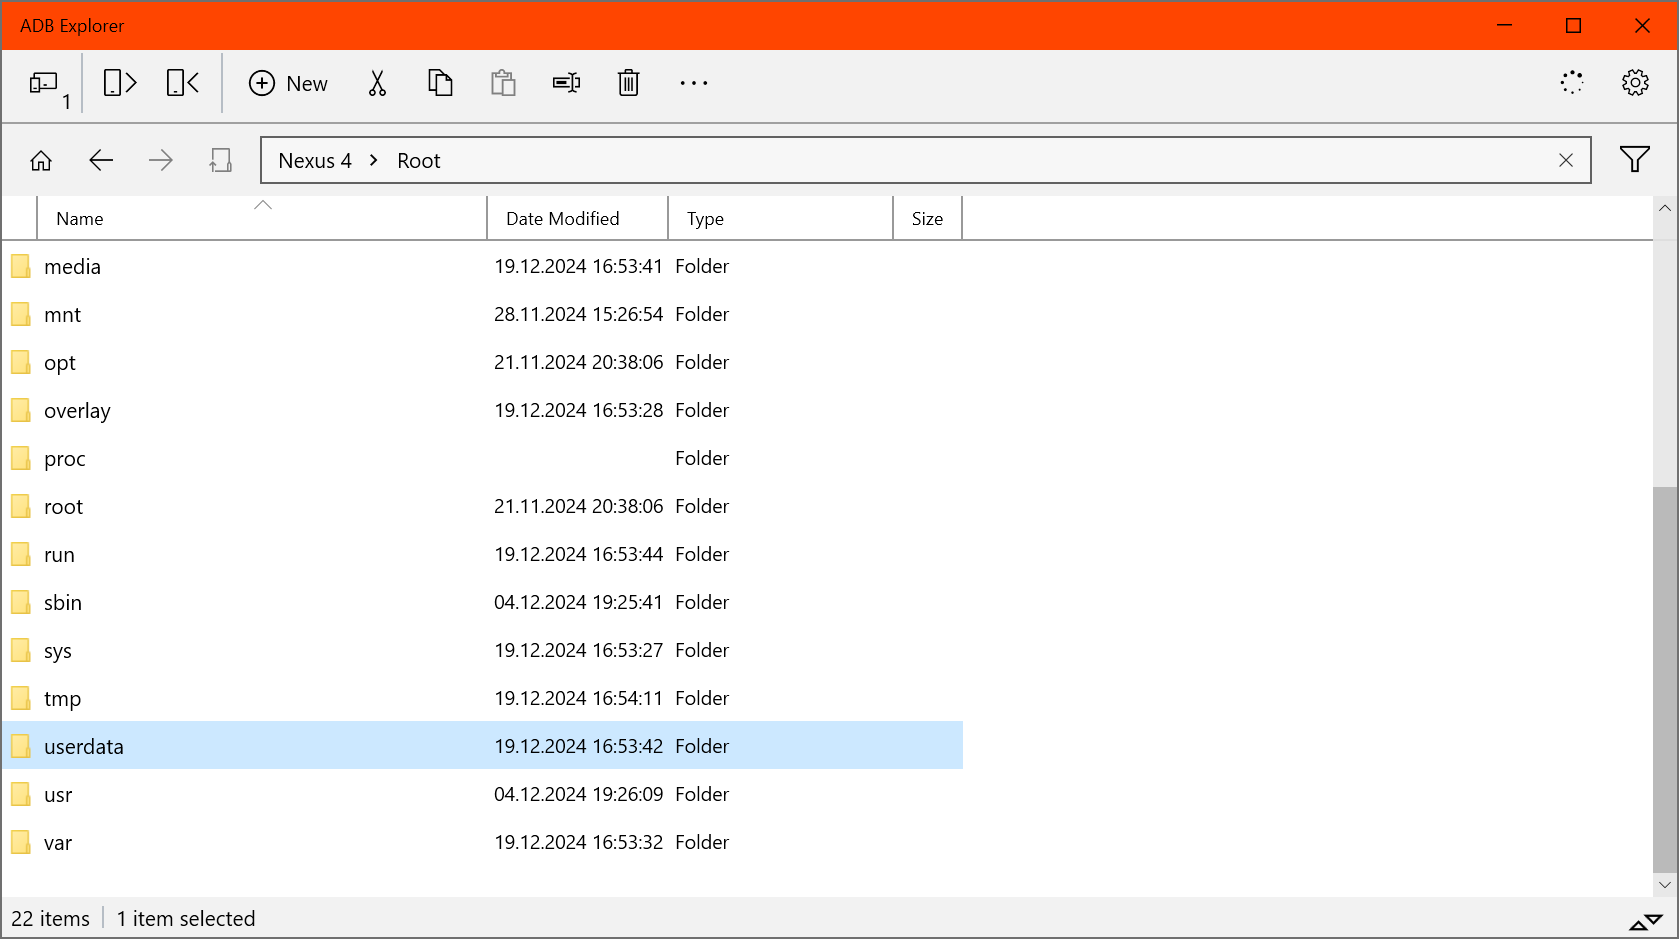
Paso 3: Desplázate hacia abajo y haz doble clic en
|

Paso 4: Has llegado a la carpeta |
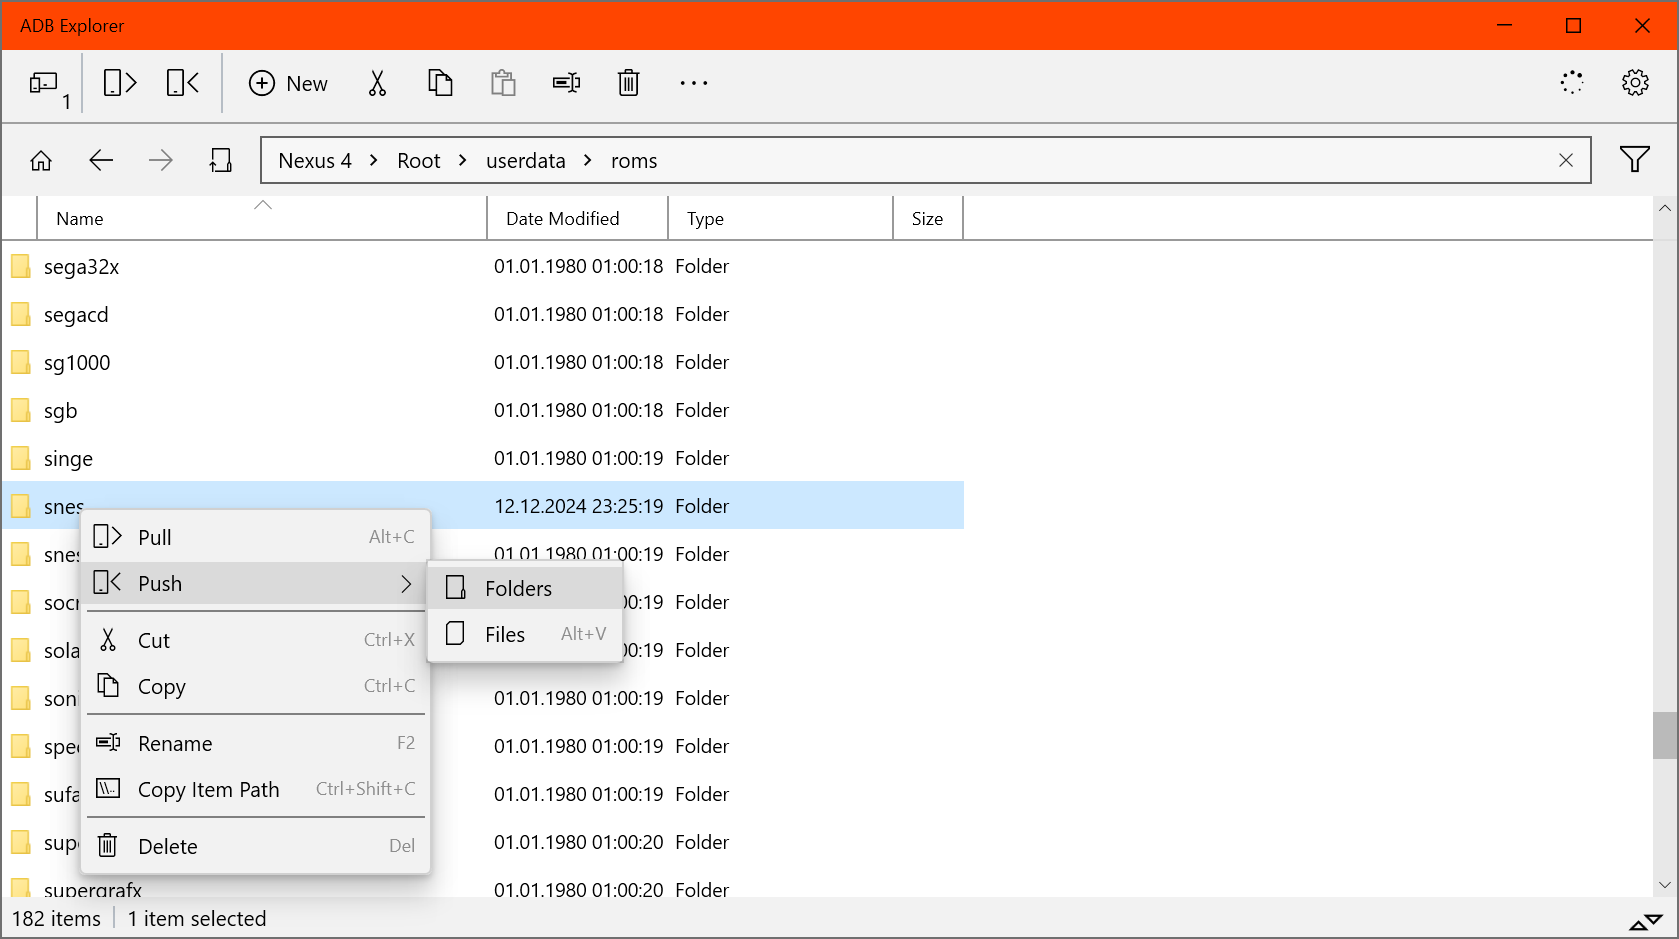
Agregar, extraer y eliminar archivos a/desde tu dispositivo
En ADB, agregar algo a un dispositivo se denomina push, mientras que extraer algo de un dispositivo se denomina pull.
Si quieres hacer push o pull a un dispositivo hacia/desde una carpeta, dirígete a dicha carpeta y haz clic derecho para abrir el menú contextual. Aquí encontrarás opciones para hacer push, pull e incluso eliminar archivos.
Establecer una conexión de línea de comandos
ADB no solo permite la transferencia de archivos, sino que también permite el acceso a la línea de comandos de tu dispositivo KNULLI. La línea de comandos de ADB es muy limitada en comparación con un shell SSH; sin embargo, cuando SSH no es una opción, ADB puede ser una herramienta útil para acceder a tu dispositivo.
Para establecer una conexión con el shell de ADB desde una computadora con Windows, simplemente localiza la carpeta de instalación de ADB SDK Platform Tools y ejecuta:
desde una terminal de Windows (PowerShell o CMD) para obtener acceso a la línea de comandos de tu dispositivo KNULLI.