Quick Start Guide
Hi there! Welcome to KNULLI!
With this quick start guide, we will help you get started with KNULLI on your handheld device. If you are completely new to handheld emulation and custom firmwares (CFWs), this guide will lead you through your first steps. If you are an advanced user, this guide will make you aware of things KNULLI might do differently than other custom firmwares you have already used.
Installing KNULLI 
Find the latest KNULLI release on our GitHub repository, find the image for your specific device in the Installation Package Downloads section, download it, and flash it onto an SD card. Do not attempt to format anything manually afterwards, KNULLI will do it for you! Just put the SD card in your device, remove SD cards from any other slot, and boot the device to finish installation. (First boot can take quite long since KNULLI will expand and format your games partition. Be patient.)
If you need more detailed information on how to install KNULLI, have a look into the Install section.
First steps
Your first steps will depend on how you want to use your KNULLI device.
1. Set up your data storage
KNULLI works fine from a single SD card. If you want to get to know KNULLI first, we recommend that you start with a single SD card and start exploring KNULLI. However, we definitely recommend to use a dual SD card setup on the long run if your device supports dual SD cards. Your first SD card will only carry the operating system. All your games, themes, save states, etc. will be stored on the second SD card. (Do not worry: It is possible to migrate from a single SD card setup to a dual SD card setup later as explained in the Dual SD Card Migration Guide.)
If you want to go for a dual SD card setup right away, please be aware that you have to switch between internal and external storage manually after first boot. You will find detailed instructions on setting up a second SD card in the Second SD Card section.
It is possible to use an already populated SD card as secondary SD card. However, if you attempt to do so, please make sure that the folder structure matches the one described in the Game Storage section.
You can also use the ext4 file system
If you prefer the ext4 file system, e.g. because you are used to dealing with Linux and want to customize your Knulli experience, e.g., by employing symbolic links, you can use the built-in formatter to reformat your device to ext4. You will find more information in the Formatting section.
Make sure that you made a decision on how to store your files and prepared the storage accordingly before you continue with the next step.
2. Set up your Wi-Fi (optional)
Press the Start button to open the main menu and go to Network settings where you can configure your Wi-Fi connection. (You will find more detailed instructions about setting up Wi-Fi and increasing security in the Networking section.)
Troubleshooting
If you are unable to connect your KNULLI device to your Wi-Fi, please make sure to disable WPA2+WPA3 encryption in your router and stick with WPA1+WPA2 instead.
Alternatively, you can try the brand new experimental service which might allow you to connect to your WPA2+WPA3-protected Wi-Fi anyway. Press Start to bring up the main menu, go to System Settings, then Services, and enable WIRELESS_HYBRID_FIX. Be aware that this feature is experimental.
3. Add games and BIOSes
You can now start to add your games. We strongly recommend that you take the time to get to know the folder structure of KNULLI in the Game Storage section.
Unless you changed the file system to ext4, you you can simply shut down your KNULLI device, take out the SD card which holds your games, and put it in your computer. You will be able to copy all your games directly to the SD card.
If you prefer a wireless solution or if you decided to use ext4, you can use network transfer instead: On Windows, open your Windows Explorer and find the KNULLI device in your Network section. If the device does not show up, you can type \\KNULLI in the address bar of your Windows Explorer to find it manually. On macOS, select Go in Finder, pick Connect to Server and type smb://KNULLI in the address bar. (If you changed the hostname manually, look for the hostname of your choice instead.)
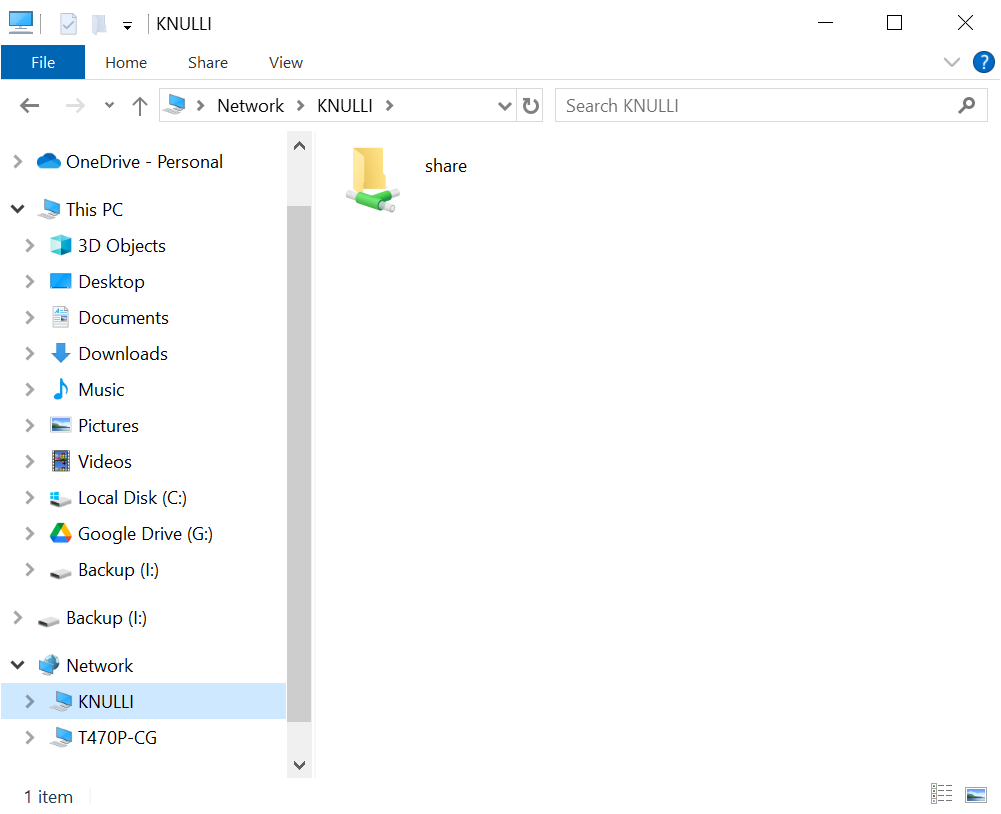
Step 1a: Find your KNULLI device in the Network section of your Windows Explorer. |
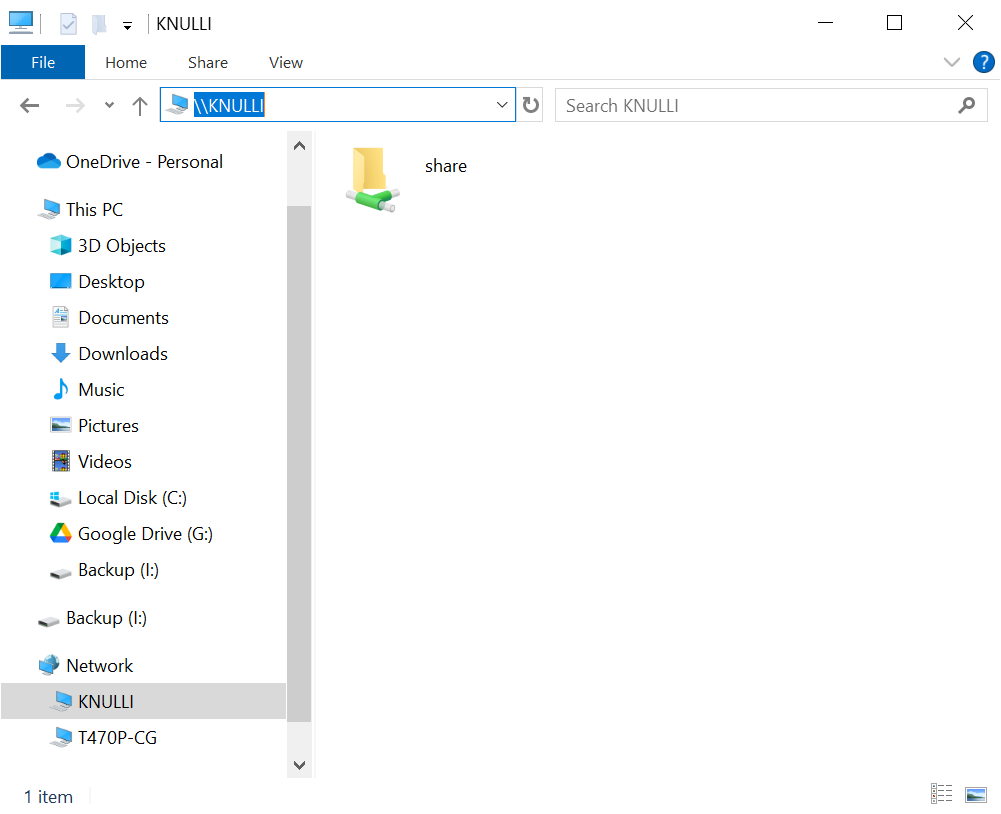
Step 1b: Find your KNULLI device by typing |
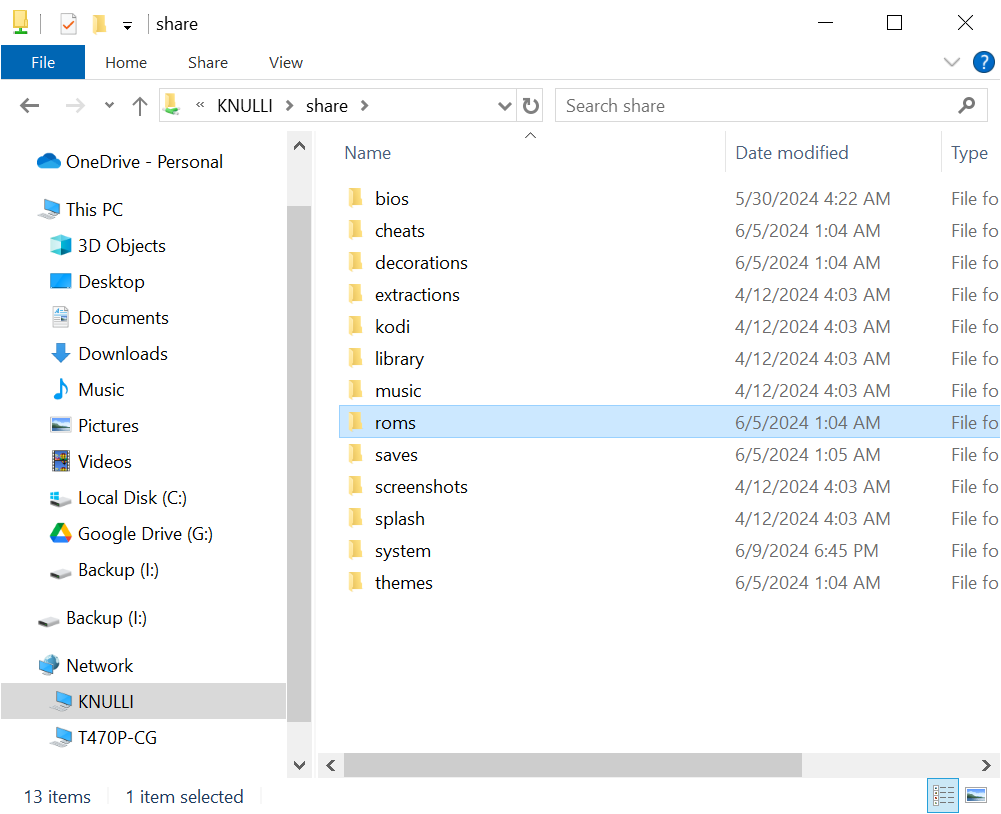
Step 2: Open the |
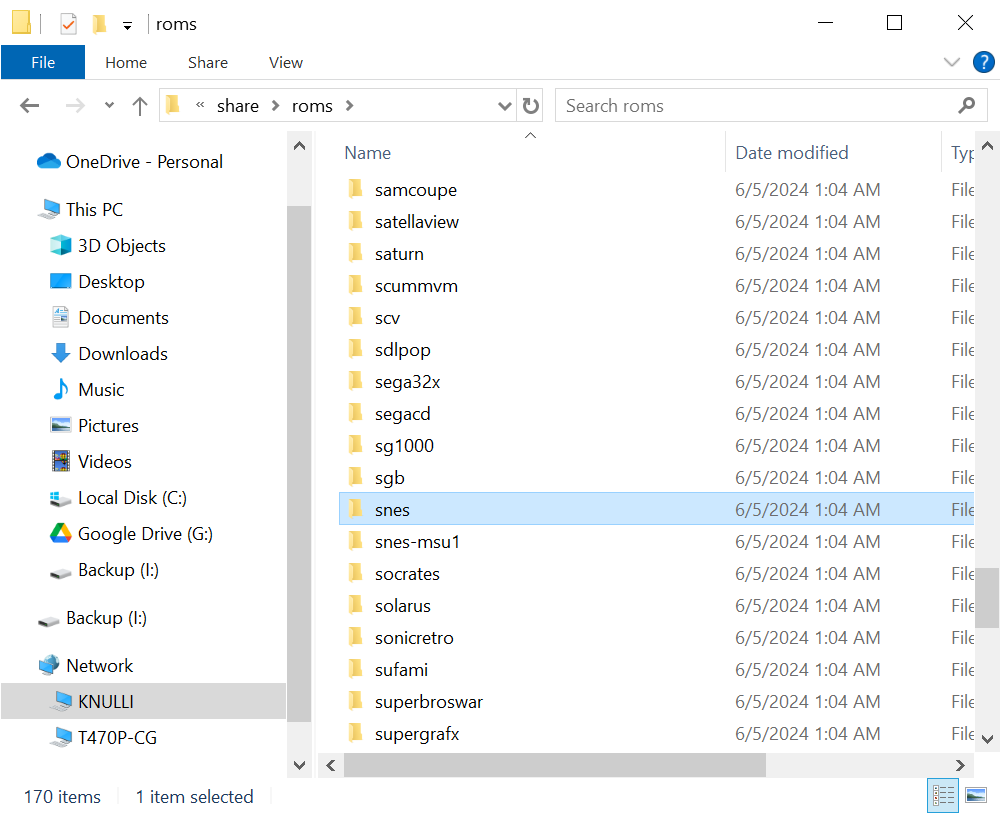
Step 3: Open the |
In any case, you may drag-and-drop your games and BIOS files from your local hard disk drives to the corresponding folders on your KNULLI device. You will find a more detailed walkthrough and more alternative solutions for adding games in the Add Games section.
4. Install PortMaster (optional)
If you are interested in ports, you probably want to install PortMaster now. Make sure that you are connected to your Wi-Fi, head to the Ports section, find Install.PortMaster and launch it. Afterwards, you will find PortMaster in the Ports section. (You will find more information about how to install and run PortMaster in the PortMaster section.)
Missing PortMaster installer
If Install.PortMaster is missing from your Ports section, please follow the instructions in the PortMaster section.
5. Scrape media (optional)
After you have added and installed all your games, you might want to add cover artworks, text descriptions and other metadata to your games. KNULLI comes with a fully functional scraper which will retrieve available media and metadata for you. Our scraper supports ScreenScraper, TheGamesDB and ArcadeDB as scraping sources. (You will find instructions for scraping in the Scraping section.)
6. Set up Retro Achievements (optional)
If you want to collect Retro Achievements, you should log in to your Retro Achievements account. Press START on your controller, select Game Settings and head to RetroAchievement Settings to enter your credentials. Be aware that Retro Achievements only work while you are connected to the internet. (You will find more information about Retro Achievements in the Retro Achievements section.)
Play!!
Congratulations - you are ready to start playing! How does that feel? If this is your first time using a device/CFW like this, we strongly recommend to learn the hotkey shortcuts (you will find them in the Hotkey Shortcuts section) before you launch the first game. Aside of that, you are good to go!
We hope you enjoy playing your games with KNULLI!