Formatting
Before you format
- Be aware that formatting implies that all data on the formatted storage will be permanently deleted.
- Make sure to choose the correct disk for formatting, especially if you have a 2-SD-card setup!
- Avoid formatting directly from your Windows/macOS/Linux computer and use the built-in KNULLI formatter instead if possible!
The built-in formatter
Available file systems
The built-in KNULLI formatter offers two different filesystems:
- ext4 is a Linux file system which cannot be accessed directly from Windows/macOS.
- exFAT is a Windows/macOS-compatible file system which is used by most CFWs, Smartphones, etc.
Formatting
The built-in KNULLI formatter can be used to format both, the internal data storage on your primary SD card (internal) and the optional second SD card (external).
To format your data storages to the file systems of your choice, open the KNULLI main menu by pressing Start and choose Format a disk in the Frontend developer options section of the System settings. Make sure to choose the correct Device to Format and the File System you want to format the device to. Be aware that you need to reboot your device to apply the formatting after you chose Format now.
After Formatting
After formatting, KNULLI will create and populate the /userdata folder for you.
Formatting with Windows
Formatting with Windows is only useful if you want to format your SD card to exFAT.
If you want to format your SD card from Windows, we strongly suggest to use the Windows Disk Management tool which will make it easier to format the correct partition. You can find the tool by opening the Start Menu and typing disk management. (The tool will present itself by the name "Create and format hard disk partitions".
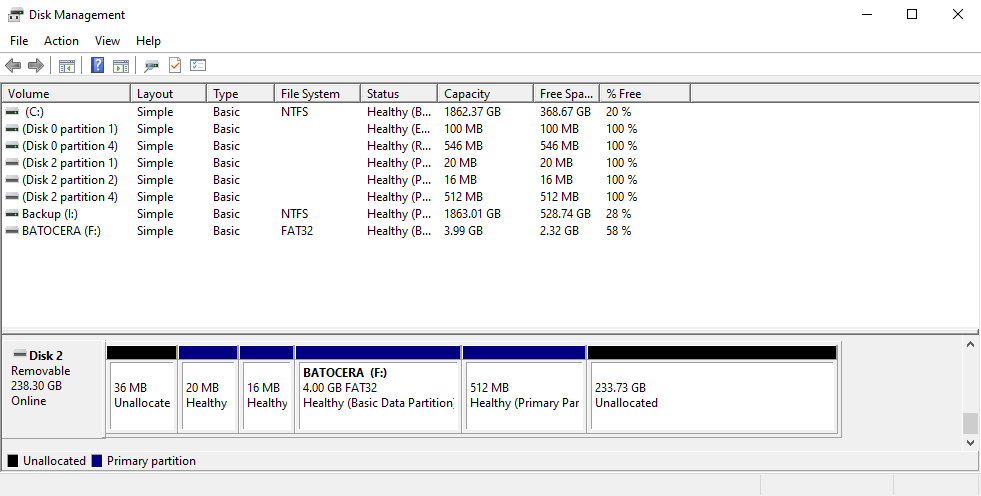
Step 1: Make sure that your partitions have been expanded properly before proceeding. The screenshot shows an SD card before the share partition was expanded with a lot of unallocated space. To make sure the partition is expanded properly, you might want to boot your KNULLI device from the SD card before proceeding. |
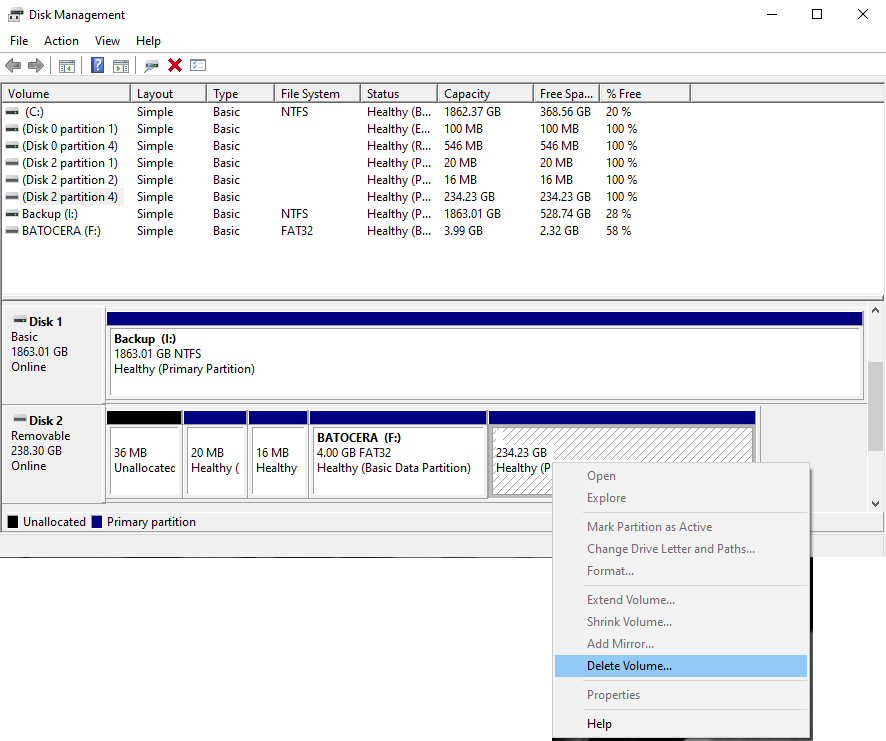
Step 2: After your SD card has been initialized, find the largest, now expanded partition, right-click and select Delete Volume.... |
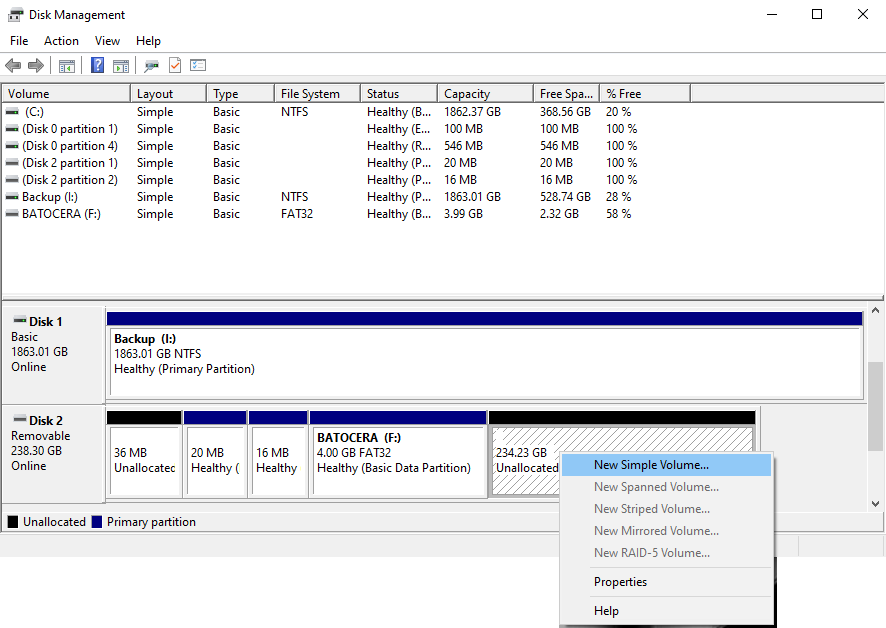
Step 3: Right-click the now unallocated space and pick New Simple Volume.... |
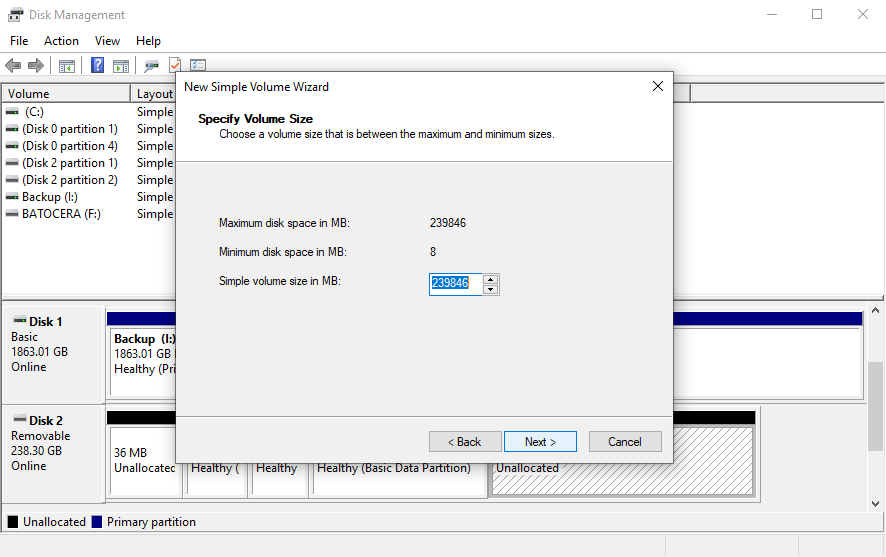
Step 4: Make sure to assign all available disk space to your newly created volume. |

Step 5: Assign a drive letter to your newly created volume. (You can pick any drive letter you want, it doesn't matter, however, we recommend to use one Windows suggests automatically.) |

Step 6: Make sure to format the volume with the file system exFAT, allocation unit size default, and volume label |
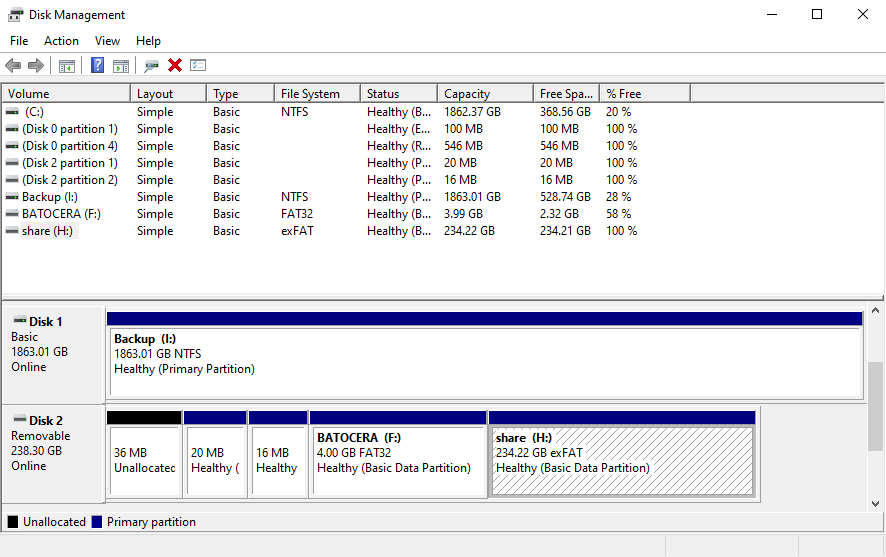
Step 7: Verify that you now have a share partition formatted to exFAT. |
After Formatting
After formatting, you should put the SD card in your device and boot KNULLI. While booting, KNULLI will create and populate the /userdata folder for you.