Guía de Inicio Rápido
¡Hola! ¡Bienvenido a KNULLI!
Con esta guía de inicio rápido, te ayudaremos a empezar a usar KNULLI en tu dispositivo portátil. Si eres nuevo en la emulación con dispositivos portátiles y los firmwares personalizados (CFWs), esta guía te guiará en tus primeros pasos. Si eres un usuario avanzado, esta guía te informará sobre las cosas que KNULLI podría hacer de forma diferente que otros firmwares personalizados que ya hayas utilizado.
Instalación de KNULLI 
Encuentra la versión más reciente de KNULLI en nuestro Repositorio de GitHub, busca la imagen para tu dispositivo en la sección Installation Package Downloads, descárgala y grábala en una tarjeta SD. No intentes formatear nada manualmente después; ¡KNULLI lo hará por ti! Sólo inserta la tarjeta SD en tu dispositivo, retira las tarjetas SD de cualquier otra ranura e inicia el dispositivo para finalizar la instalación. (El primer arranque puede tardar bastante, ya que KNULLI expandirá y formateará la partición de tus juegos. Ten paciencia).
Si necesitas información más detallada sobre cómo instalar KNULLI, consulta la sección Instalar KNULLI.
Primeros pasos
Tus primeros pasos dependerán de cómo quieras usar tu dispositivo KNULLI.
1. Configura tu almacenamiento de datos
KNULLI funciona correctamente con una sola tarjeta SD. Si primero quieres conocer KNULLI, te recomendamos empezar con una sola tarjeta SD y explorarlo. Sin embargo, te recomendamos usar una configuración de doble tarjeta SD a largo plazo si tu dispositivo admite dos tarjetas SD. Tu primera tarjeta SD solo contendrá el sistema operativo. Todos tus juegos, temas, estados guardados, etc., se almacenarán en la segunda tarjeta SD. (No te preocupes: es posible migrar de una configuración de una sola tarjeta SD a una de doble tarjeta SD después, como se explica en la guía de Migración a Doble Tarjeta SD).
Si quieres usar una configuración de doble tarjeta SD de inmediato, ten en cuenta que debes cambiar entre el almacenamiento interno y externo manualmente después del primer arranque. Encontrarás instrucciones detalladas sobre cómo configurar una segunda tarjeta SD en la sección Segunda Tarjeta SD.
Es posible usar una tarjeta SD ya ocupada como tarjeta SD secundaria. Sin embargo, si intentas hacerlo, asegúrate de que la estructura de carpetas coincida con la descrita en la sección Almacenamiento de los Juegos.
También peudes usar el sistema de archivos ext4.
Si prefieres el sistema de archivos ext4, por ejemplo, porque estás acostumbrado a trabajar con Linux y deseas personalizar tu experiencia con Knulli, por ejemplo, mediante enlaces simbólicos, puedes usar el formateador integrado para re-formatear tu dispositivo a ext4. Encontrarás más información en la sección Formatear.
Asegúrate de haber decidido cómo almacenar tus archivos y de haber preparado el almacenamiento adecuadamente antes de continuar con el siguiente paso.
2. Configura tu Wi-Fi (opcional)
Presiona el botón Start para abrir el menú principal y ve a Configuración de Red, donde podrás configurar tu conexión Wi-Fi. (Encontrarás instrucciones más detalladas sobre cómo configurar el Wi-Fi y aumentar la seguridad en la sección Redes).
Solución de problemas.
Si no puedes conectar tu dispositivo KNULLI a tu Wi-Fi, asegúrate de desactivar el cifrado WPA2+WPA3 en tu router y usa WPA1+WPA2.
Como alternativa, puedes probar el nuevo servicio experimental, que podría permitirte conectarte a tu Wi-Fi protegida con WPA2+WPA3. Presiona Start para abrir el menú principal, ve a Ajustes del Sistema, luego a Servicios y activa WIRELESS_HYBRID_FIX. Ten en cuenta que esta función es experimental.
3. Agregar juegos y BIOS
Ahora puedes empezar a agregar tus juegos. Te recomendamos fuertemente que te familiarices con la estructura de carpetas de KNULLI en la sección Almacenamiento de los Juegos.
A menos que hayas cambiado el sistema de archivos a ext4, simplemente apaga tu dispositivo KNULLI, extrae la tarjeta SD que contiene tus juegos e introdúcela en tu computadora. Podrás copiar todos tus juegos directamente a la tarjeta SD.
Si prefieres una solución inalámbrica o si decidiste usar ext4, puedes usar la transferencia de red: En Windows, abre el Explorador de Windows y busca el dispositivo KNULLI en tu Red. Si el dispositivo no aparece, puedes escribir \\KNULLI en la barra de direcciones del Explorador de Windows para encontrarlo manualmente. En macOS, selecciona Ir en Finder, elige Conectar al servidor y escribe smb://KNULLI en la barra de direcciones. (Si cambiaste el hostname manualmente, busca en su lugar el hostname que elegiste).
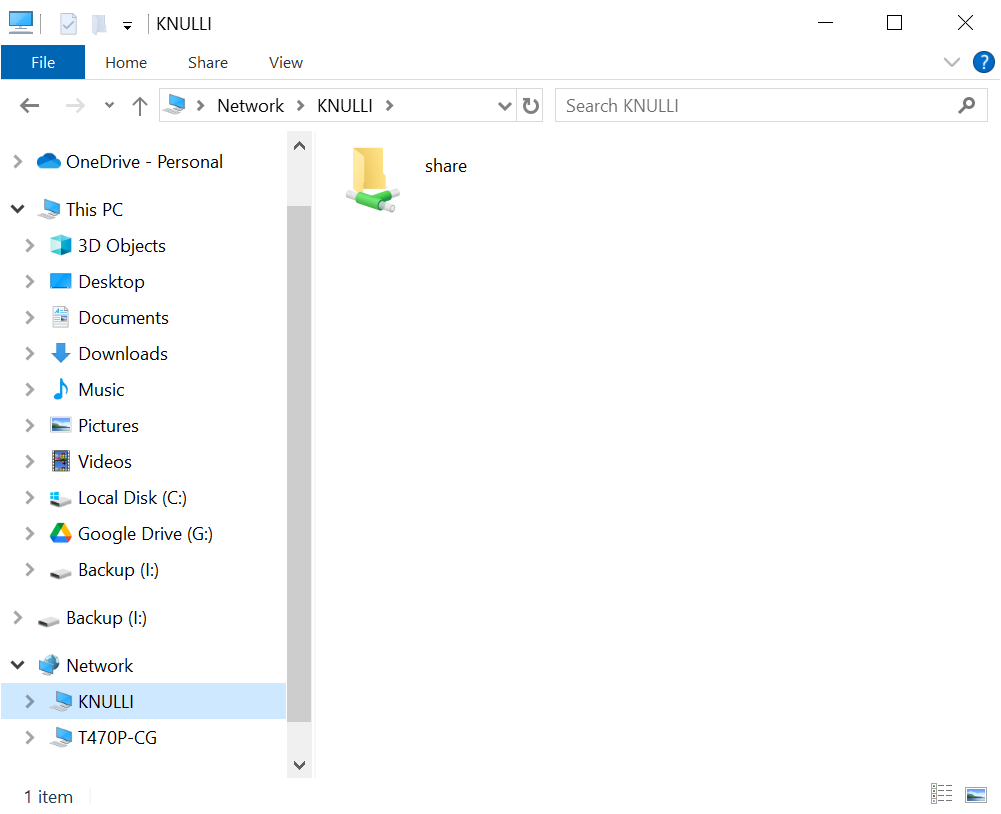
Paso 1a: Busca tu dispositivo KNULLI en la sección Red del Explorador de Windows. |
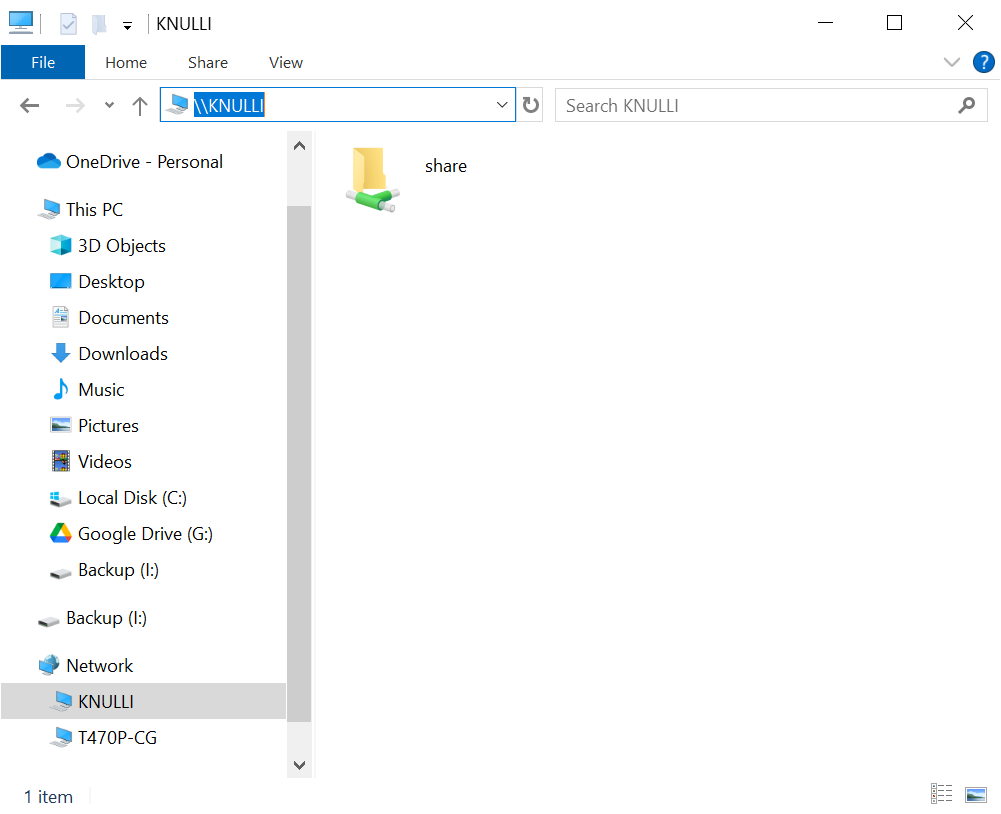
Paso 1b: Busca tu dispositivo KNULLI escribiendo |
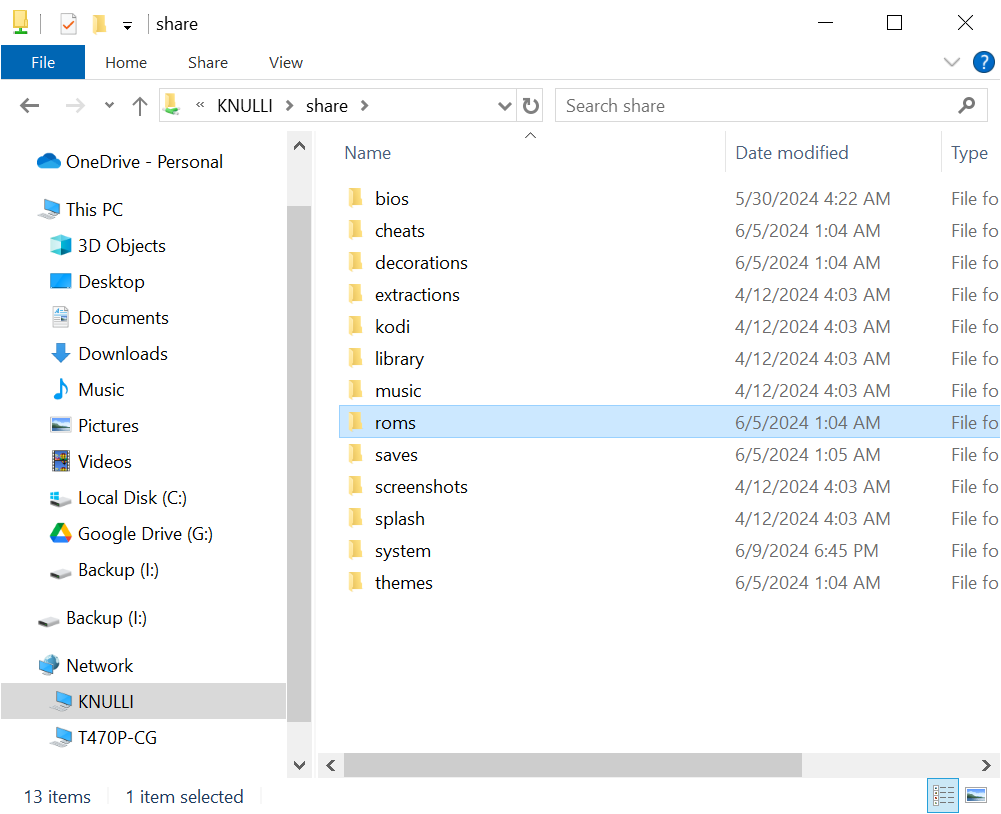
Paso 2: Abre la carpeta |
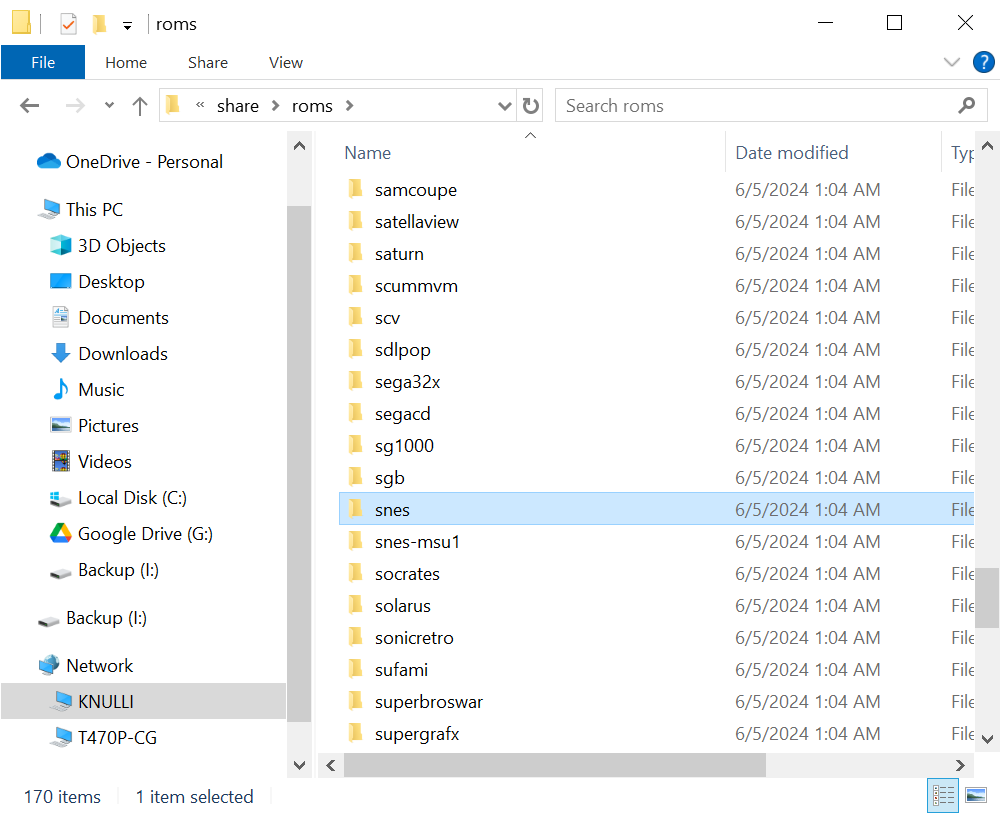
Paso 3: Abre la carpeta |
En cualquier caso, puedes arrastrar y soltar tus juegos y archivos de BIOS desde tus discos duros locales a las carpetas correspondientes en tu dispositivo KNULLI. Encontrarás una guía más detallada y otras soluciones para agregar juegos en la sección Añadir Juegos.
4. Instalar PortMaster (opcional)
Si te interesan los ports, probablemente quieras instalar PortMaster ahora. Asegúrate de estar conectado a tu Wi-Fi, ve a la sección Ports, busca Install.PortMaster e inícialo. Después, encontrarás PortMaster en la sección Ports. (Encontrarás más información sobre cómo instalar y ejecutar PortMaster en la sección PortMaster).
Instalador de PortMaster no disponible.
Si Install.PortMaster no está en la sección Ports, sigue las instrucciones de la sección PortMaster.
5. Extraer contenido multimedia (opcional)
Después de agregar e instalar todos tus juegos, puedes añadir carátulas, descripciones de texto y otros metadatos. KNULLI incluye un extractor de contenido totalmente funcional que encontrará el contenido multimedia y los metadatos disponibles por ti. Nuestro extractor es compatible con ScreenScraper, TheGamesDB y ArcadeDB como fuentes de extracción. (Encontrarás instrucciones para extraer contenido en la sección Scraping).
6. Configurar RetroAchievements (opcional)
Si quieres conseguir logros retro, inicia sesión en tu cuenta de RetroAchievements. Presiona START en tu control, selecciona Ajustes de Juegos y dirígete a Ajustes de RetroAchievements para introducir tus credenciales. Ten en cuenta que RetroAchievements solo funciona con conexión a internet. (Encontrarás más información sobre RetroAchievements en la sección Logros).
¡A jugar!
¡Felicidades! ¡Estás listo para empezar a jugar! ¿Qué te parece? Si es la primera vez que usas un dispositivo/firmware personalizado como este, te recomendamos fuertemente que aprendas los atajos (los encontrarás en la sección Atajos) antes de iniciar el primer juego. ¡Fuera de eso, estás listo!
¡Esperamos que disfrutes jugando tus juegos con KNULLI!
¡No estás solo!
Si tienes algún problema, no te preocupes, ¡no estás solo! Encuentra ayuda en nuestra wiki, consulta las Preguntas Frecuentes o únete a nuestro Discord, donde intentaremos responder a tus preguntas.